This page will show you how to setup a port forward on the AirLive WT-2000ARM router.
If you are not sure what port forwarding is you can read our What is Port Forwarding guide to help get started.
Other AirLive WT-2000ARM Guides
This is the port forwarding guide for the AirLive WT-2000ARM. We also have the following guides for the same router:
- AirLive WT-2000ARM - How to change the IP Address on a AirLive WT-2000ARM router
- AirLive WT-2000ARM - AirLive WT-2000ARM Login Instructions
- AirLive WT-2000ARM - Setup WiFi on the AirLive WT-2000ARM
- AirLive WT-2000ARM - AirLive WT-2000ARM User Manual
- AirLive WT-2000ARM - How to change the DNS settings on a AirLive WT-2000ARM router
- AirLive WT-2000ARM - How to Reset the AirLive WT-2000ARM
- AirLive WT-2000ARM - Information About the AirLive WT-2000ARM Router
- AirLive WT-2000ARM - AirLive WT-2000ARM Screenshots
Configure your Computer to Have a Static IP Address
Port forwarding the AirLive WT-2000ARM to your computer can be more reliable if you first configure a static IP address on your computer. We have instructions to setup a static IP address for Windows 7, Windows 8, and a variety of other devices on our Static IP Address Settings page.
Please note that while setting up a static IP address on your computer is optional, it is still a very good idea to go ahead and do it. In the long run it will make your port forward much more reliable.
Login To The AirLive WT-2000ARM
To get started forwarding a port you need to login to your AirLive WT-2000ARM router. If you are already logged in you can skip this step.
To login to the AirLive WT-2000ARM, follow our AirLive WT-2000ARM Login Guide.
Forward a Port on the AirLive WT-2000ARM router
Find The Port Forwarding Section of the AirLive WT-2000ARM

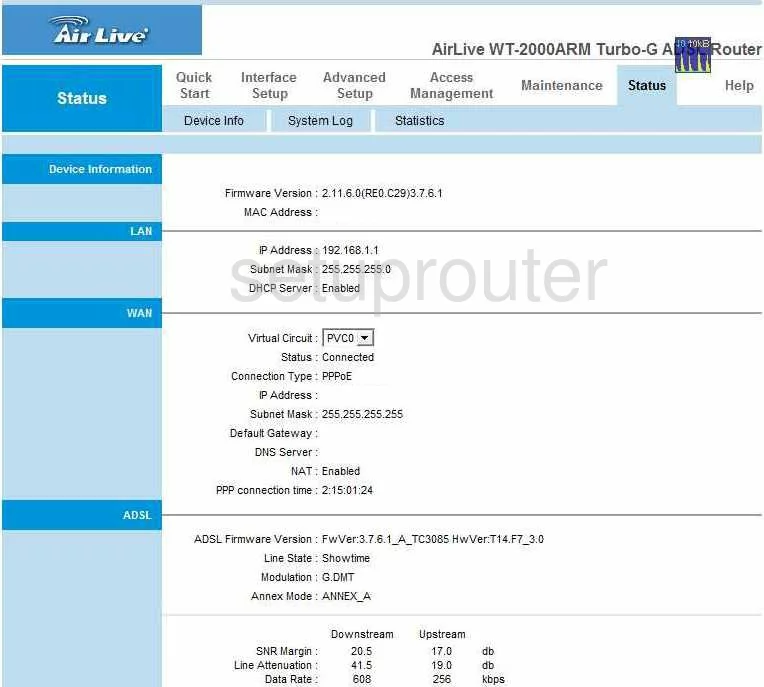
After you have logged into the AirLive WT-2000ARM, it places you on the Status page. From here, you click the choice at the top labeled Advanced Setup, and under that NAT. You are now on a new page where you need to click the link near the bottom of the page labeled Virtual Server.
Configure the Port Forwarding section of your AirLive WT-2000ARM
Now to forward a port, make the following changes:

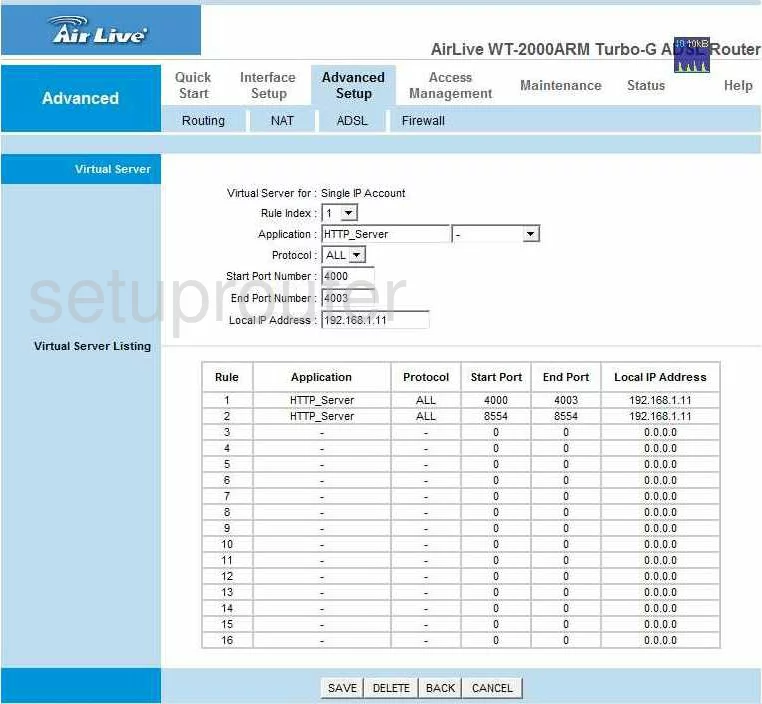
You should now be on a page like the one you see above. In the Application box enter the program. This is not important what you type here, just so you remember why you are forwarding these ports.
Under this, choose the protocol type you are using from the Protocol drop down menu.
If you are forwarding a single port, enter that port number into both the Start Port Number box and the End Port Number box. If you are forwarding multiple ports, enter the lowest number in the range in the Start Port Number box and the highest number of the range in the End Port Number box.
Next is the Local IP Address, here you enter the IP Address that you are forwarding the ports to, for example if you are using these port forwards to run a program on your computer, then you must use that computer's IP Address.
When you are done, click Save and you are finished.
Test if Your Ports are Open
Now that you have forwarded ports on the AirLive WT-2000ARM you should test to see if your ports are forwarded correctly.
To test if your ports are forwarded you should use our Open Port Check tool.
Other AirLive WT-2000ARM Info
Don't forget about our other AirLive WT-2000ARM info that you might be interested in.
This is the port forwarding guide for the AirLive WT-2000ARM. We also have the following guides for the same router:
- AirLive WT-2000ARM - How to change the IP Address on a AirLive WT-2000ARM router
- AirLive WT-2000ARM - AirLive WT-2000ARM Login Instructions
- AirLive WT-2000ARM - Setup WiFi on the AirLive WT-2000ARM
- AirLive WT-2000ARM - AirLive WT-2000ARM User Manual
- AirLive WT-2000ARM - How to change the DNS settings on a AirLive WT-2000ARM router
- AirLive WT-2000ARM - How to Reset the AirLive WT-2000ARM
- AirLive WT-2000ARM - Information About the AirLive WT-2000ARM Router
- AirLive WT-2000ARM - AirLive WT-2000ARM Screenshots