If you are forwarding ports to your PS3, you need to permanently assign an internal IP address to that gaming console. Forwarding ports on your router will direct all traffic on certain ports to the internal IP address that you list. If you do not permanently assign an internal IP address to your PS3 console, you may get a different IP address the next to you restart your console causing your forwarded ports to stop working. To avoid this you can either assign an IP address in your router for your PS3 or setup a static IP address in your gaming console.
First you need to look for a way to permanently assign an IP address in your router. This process will differ from router to router.
If you find that you have a router that does not allow for you to manually select IP addresses, you then have to set up the static IP address with the PS3 console itself.
Important Terms to Know:
Internal IP Address vs. External IP Address
- Internal IP addresses are allocated by your router and are assigned to devices on your network. Your router uses these internal IP addresses to get the correct information to each device. Internal IP addresses are used only by your router and they are not available to others over the internet.
- External IP addresses are those that are shared with the world over the internet. Your router has an external IP address, allocated by your ISP (Internet Service Provider), which it uses to transfer data between your network and the internet.
Static Internal vs Dynamic Internal IP Address
- Static Internal IP Address refers to IP addresses that are permanently assigned. The internal IP address of your router is static. Some devices work the best using a static IP address.
- Dynamic Internal IP Addresses are assigned by the router and can change from time to time. This is why they are called dynamic. For example, a laptop using a dynamic internal IP address may have a different internal IP address after power is cycled to the laptop.
How to Manually Assign an IP address in Your Router
Some routers have a handy feature where you can simply assign a permanent IP address to your PS3 in the router. No changes are then required in your PS3 console. Your router then takes care of always assigning your PS3 the same IP address which functions exactly the same as a static IP. Follow these steps to assign an IP address in your router:
Step One
You can choose to permanently assign your PS3 to the IP address that it is currently using. To find this number:
- Select the Settings option from the PS3 dashboard.
- Choose System Settings.
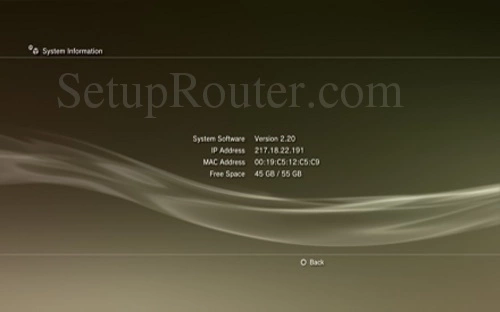
- Finally, click System Information from the available options.
- On this page, locate the IP Address and MAC Address. Write both of these numbers
Step Two
Login to your router (through your computer) and permanently assign your PS3 to that IP address. For help logging in to your router visit our login guides.
Here is an example of a router that allows you to manually assign IP addresses.
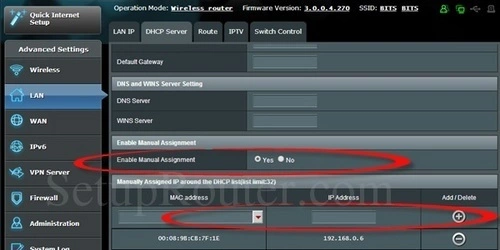
In this router, there is a box to type the IP address into and then a drop down menu for the MAC address. (The MAC address of your PS3 console is a unique number and every console is assigned a different one from the factory.) Some routers do not have a drop down menu to choose the MAC address from and instead have a place to type it in.
Step Three
After you have set your PS3 to a specific IP address, you will need to test the connection to make sure it is working. To do this:
- From the PS3 Dashboard, select the Settings choice.
- Scroll down the list and click Network Settings.
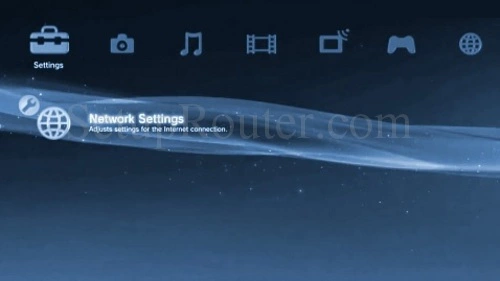
- Next choose Internet Connection Test.
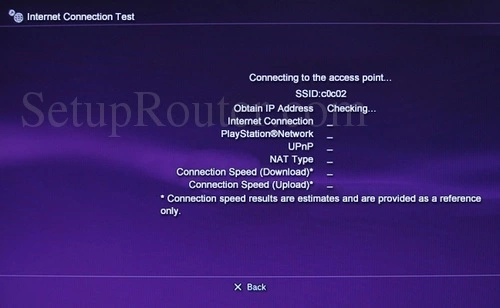
- Go ahead and let the test run. It is checking the connections to make sure the console can communicate with your network and the internet.
Step Four
Once you have permanently assigned an IP Address to your PS3 you can go ahead and setup a port forward. For help forwarding a port, check out our router guides.
How to Setup a Static IP Address in Your PS3
If you have a router that does not allow you to manually assign internal IP addresses, follow these instructions to set up a static IP address in your PS3:
Step One
Find out what IP address, subnet mask, and gateway your PS3 console is currently using. To find this info:
- From the PS3 Home screen, click the option of Settings.
- Select Network Settings.
- Finally, click the option of Settings and Connection Status List.
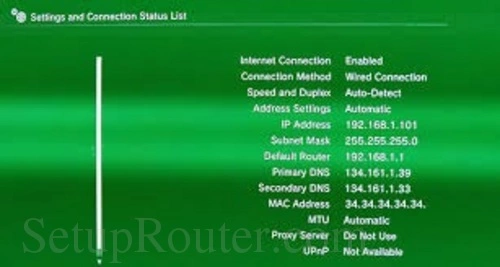
On this Settings and Connection Status List page, locate the IP Address, Subnet Mask, and Default Router. Write these numbers down as you will need them later.
Step Two
Login to your router, through your computer, and note the DHCP range your router uses. The DHCP range is the group of numbers that your router uses to assign internal IP addresses to devices on your network. For help logging in to your router visit our login guides.
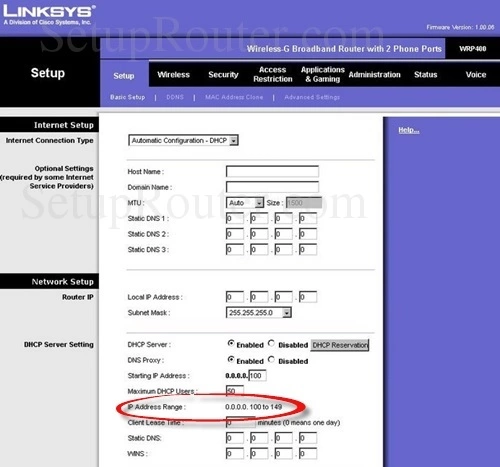
Below is an example of a Linksys router with the DHCP Range circled in red.
Step Three
Next, you need to pick a number between 2 and 254 that is not in your router's DHCP range to assign to your PS3.
In the example above, the Linksys router uses the range of 100-149 to assign IP addresses to devices on the internal network. I would choose to assign my PS3 to 151. The IP address that I am going to assign to my PS3 is 192.168.1.151. (Be sure to use the first three numbers that are in your router's IP address, also known as the gateway.) Here are a few more examples for you:
- If your router's DHCP range is 200-254 try choosing a number between 2 and 199 for your PS3.
- If your router uses 50-200, you could use a number between 2 and 49.
Step Four
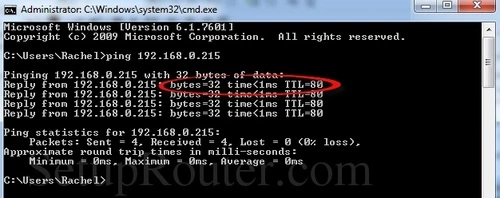
To find out if the address you chose is available ping the address using the command prompt. To do this:
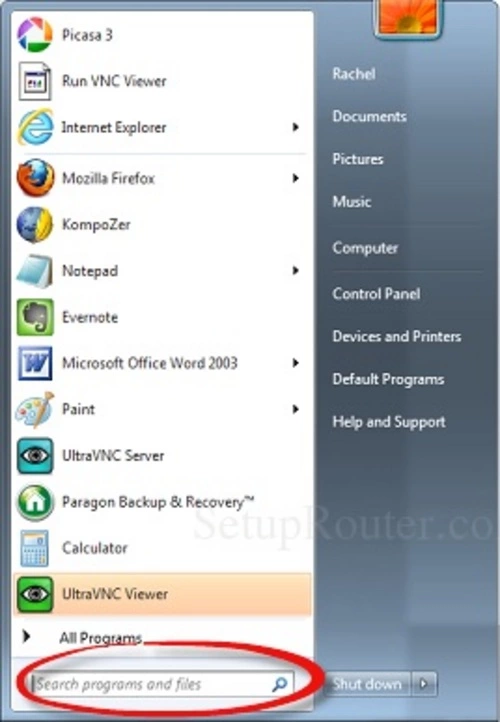
- Click on the windows Start Menu
- Type cmd into the dialog box, in the windows start menu.
- Now click on cmd.exe. This is at the very top of the menu in the screenshot below.
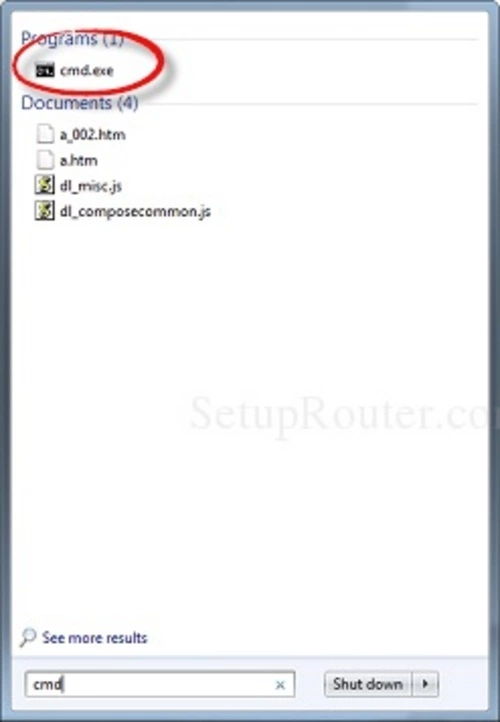
A black window with white writing now appears.

In this black window:
- Type ping
- Tap the space bar
- Then type in the IP address you want to check. Hit Enter.
If you ping an address and do not receive a reply, then the IP address is available for you to use. (See example above.) If you do receive a reply then that IP address is in use and you need to try a different one. Below is an example showing an address that you can't use because it has already been assigned.
Step Five
Use the chosen IP address and assign it to your PS3 in the console's menu.
- Click the Settings option in the PS3's home menu.
- Select the option of Network Settings.
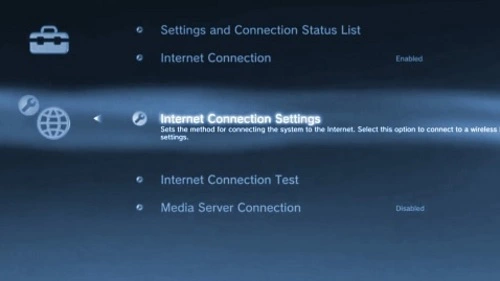
- Next, choose Internet Connection Settings.
- Click Yes if a confirmation screen pops up letting you know you will be disconnected from the Internet.
- Then, select OK to the next question before continuing.
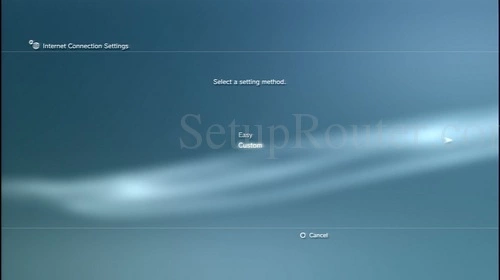
- For the Setup Method, click Custom.
- Select Wireless for the Connection Method since this guide is assuming you're PS3 is connected to your network through a router.
- The next page asks you to select the operation mode, go ahead and click Manual Settings.
- Choose Auto-Detect for the Speed and Duplex.
- Then select Manual on the IP Address Setting page.
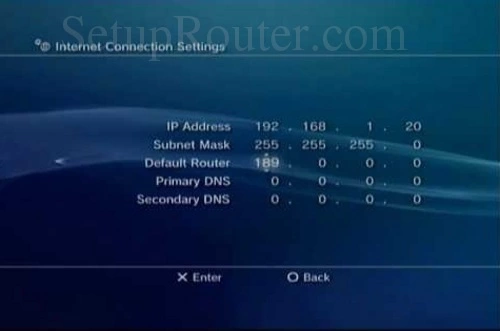
You should now be on a page like the one you see above.
- In the IP Address spot, go ahead and enter the new IP Address you have chosen for your PS3.
- Enter in the Subnet Mask you wrote down earlier in Step One. This is normally going to be 255.255.255.0
- Finally enter the Default Router address you wrote down in Step One This is the internal address of your router.
- You may also need to enter in a Primary and Secondary DNS before continuing. The easiest way to find out what these numbers should be is to call your ISP or Internet Service Provider. Ask them what DNS addresses your PS3 should use and enter in the two numbers they give you.
- Click the X button to save these changes
- The next screen asks for the MTU. Go ahead and choose Automatic.
- For the Proxy Server, select Do Not Use.
- Disable the UPnP.
- You are then taken to a page where you need to confirm all the choices you just made. If everything looks correct, then click the X button on your controller to save these changes.
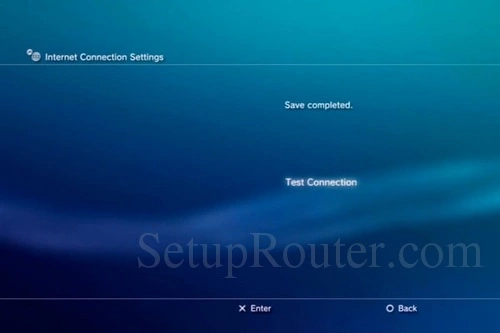
- Click Test Connection on this new page.
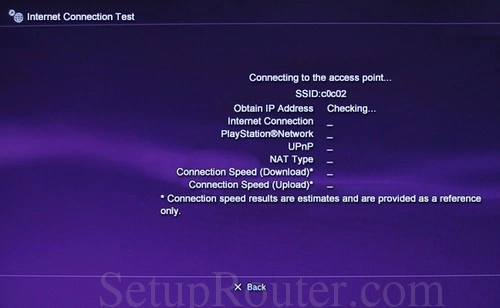
Once the test is complete everything should have succeeded except the UPnp which you disabled.
You can now setup port forwards on your PS3. For help with port forwarding you can check out our router guides.
More Info
- To learn more about IP addresses you can check out this guide.
- If you need to figure out how to find your router's IP address this guide can help.
- You can find the user manual for your router within our router guides.
- To learn about what a port is visit this guide.